Fun With Aws Ses
How to Set Up a Reliable and Scalable Email Service with AWS SES using a Custom Domain
Setting up a reliable and scalable email service is crucial for any business or organization that needs to communicate with its customers, clients, or members. AWS SES (Amazon Web Services Simple Email Service) is a powerful email service that allows you to send and receive email messages in a scalable and cost-effective way. In this article, we will guide you through the steps to set up AWS SES using a custom domain.
Prerequisite
- Having an AWS account: To use AWS SES, you need to have an AWS account. If you do not have an account, you can sign up for a free account on the AWS website.
- Having access to DNS settings: You need to have access to the DNS settings for your domain to complete the verification process in AWS SES. In this example, Cloudflare is used as the DNS provider. If you are using a different DNS provider, you should follow the provider-specific instructions to complete the verification process.
Steps
Verify domain with AWS SES
- Access the Amazon SES product page: The first step is to log in to your AWS account and navigate to the Amazon SES product page.
- Configure Verified identities (Domain): Once you are on the Amazon SES product page, go to the “Domains” section and click on “Verify a New Domain”. Enter the domain name you want to verify and click “Verify This Domain”.
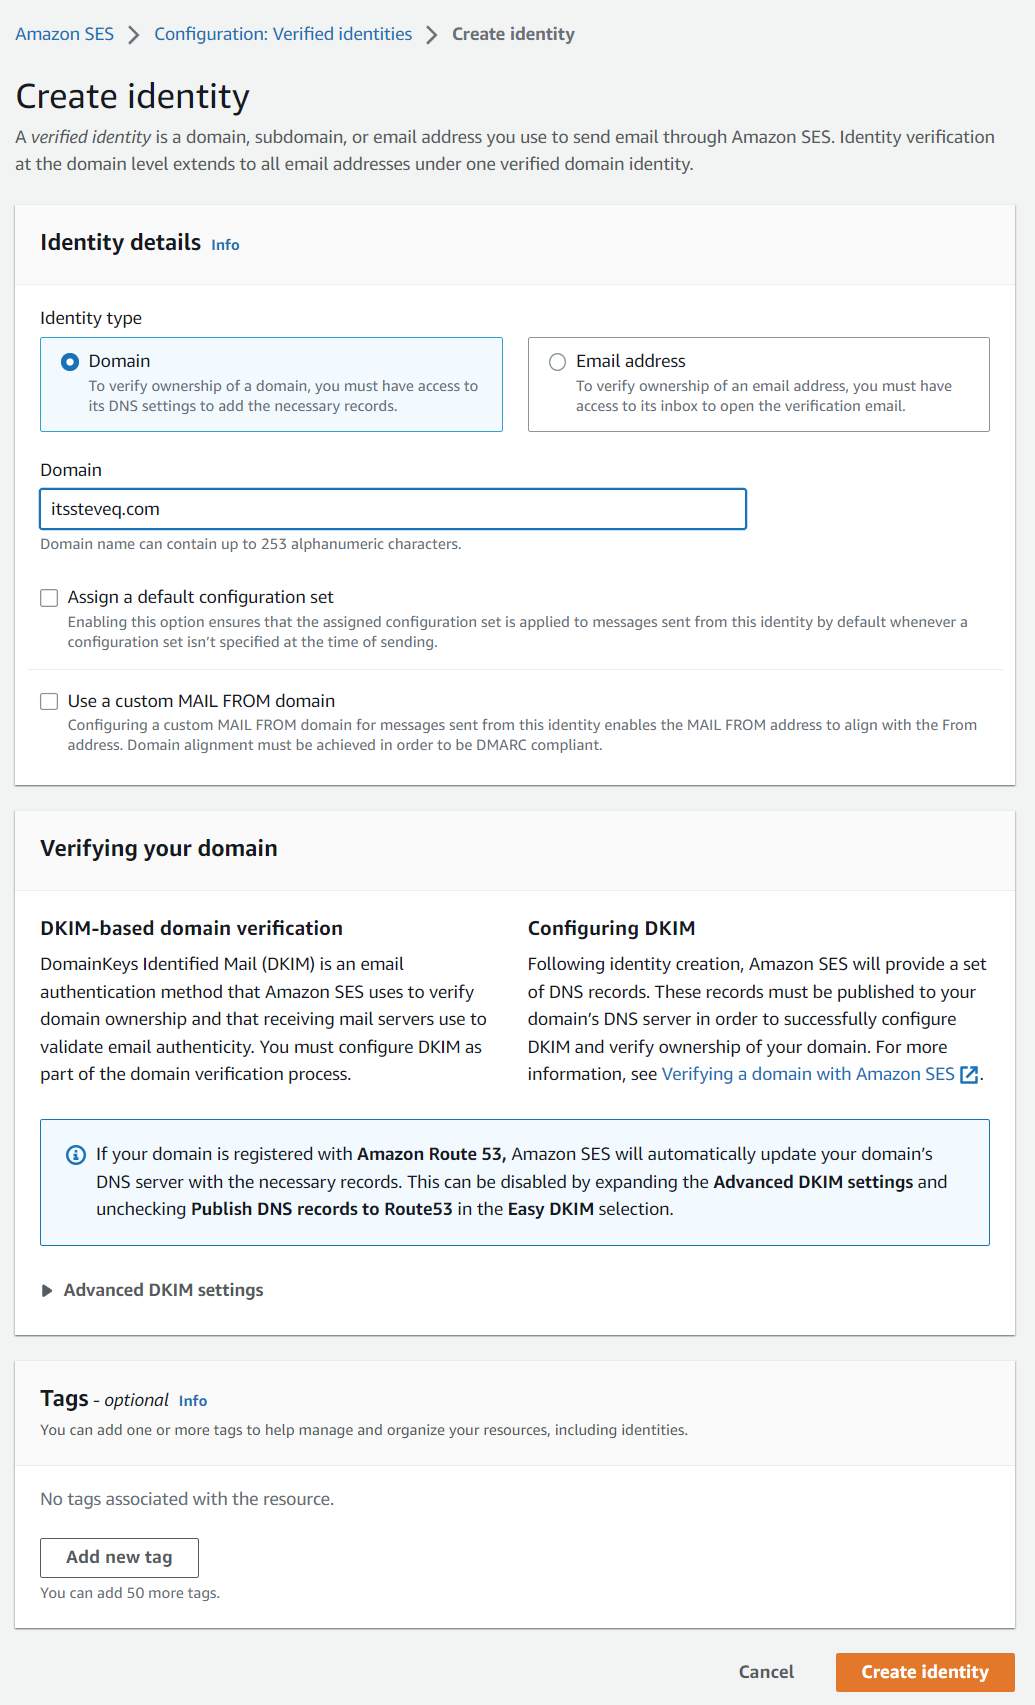
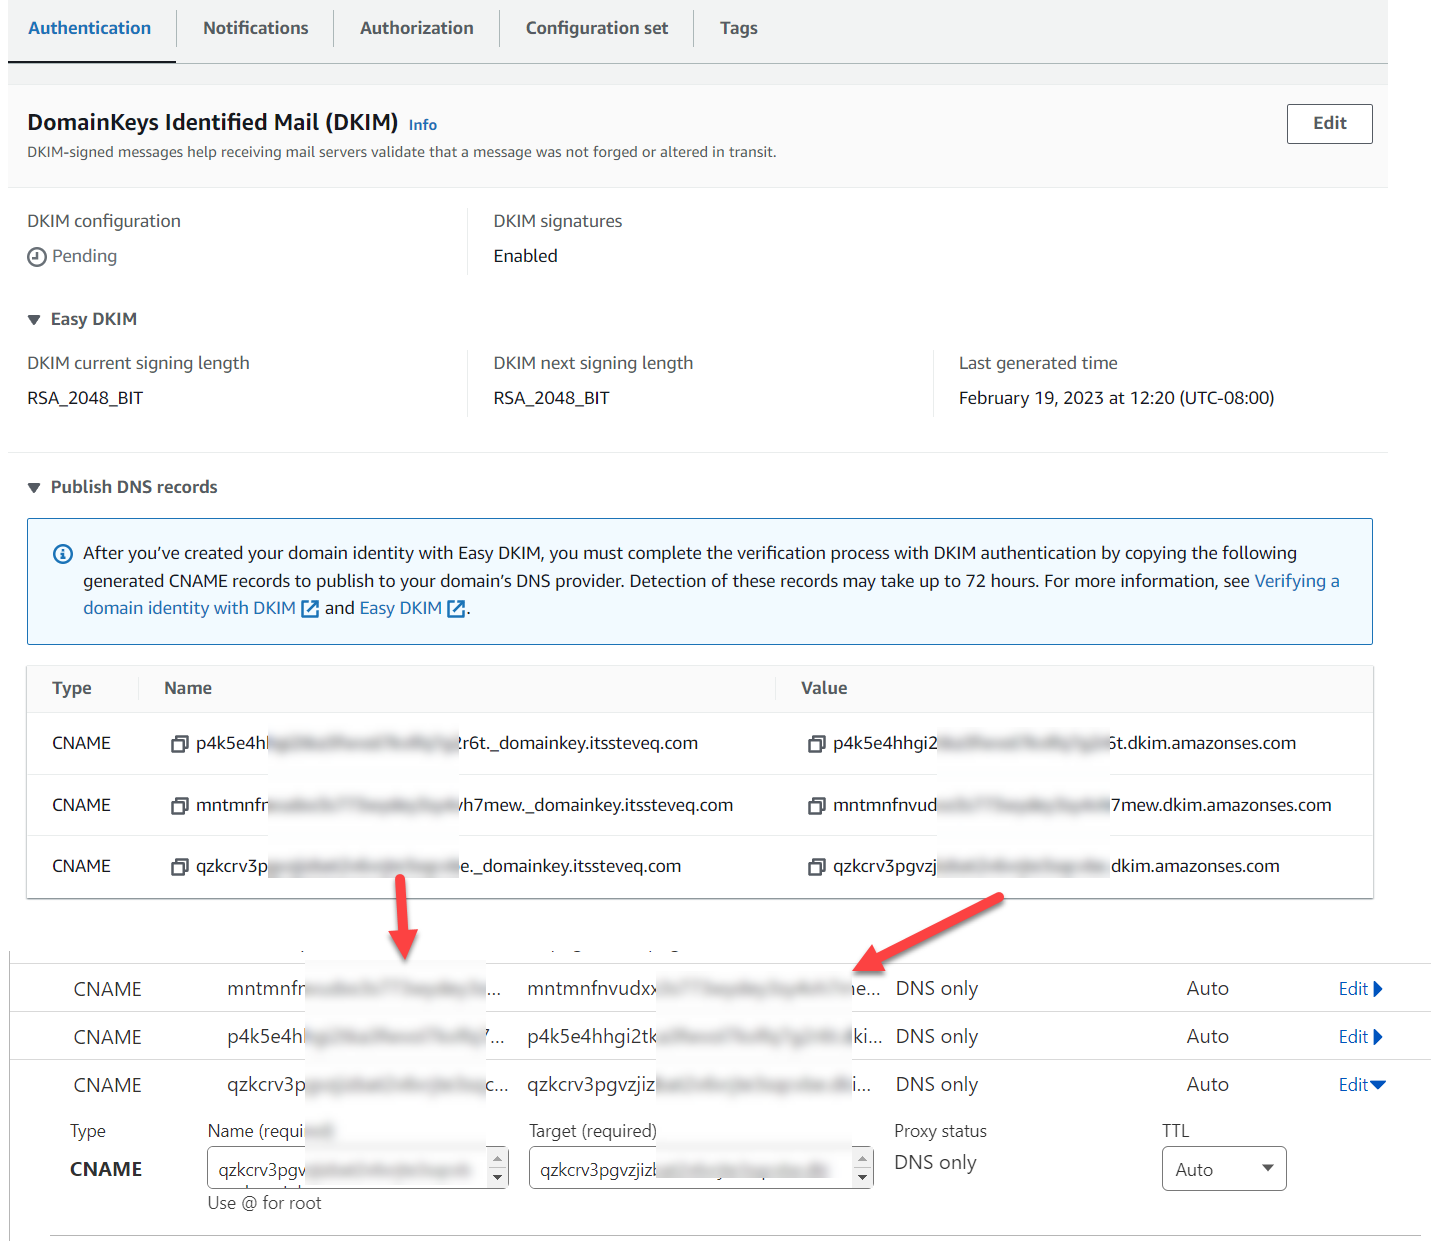
- Using “Easy DKIM” method, edit the “DNS records” that is displayed in the identities page: After entering your domain name, you will be prompted to choose a method for verifying your domain. Select the “Easy DKIM” method and follow the instructions to create a new set of DNS records that need to be added to your domain’s DNS settings. These DNS records contain information that AWS SES uses to verify that you own the domain.
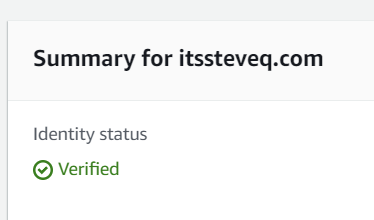
- Once changed the DNS settings, wait for “Identity status” changing from “Verification pending” to “Verified”: After you have added the DNS records to your domain’s DNS settings, it may take some time for the changes to propagate. You can check the status of your domain verification by going to the “Domains” section of the Amazon SES console and looking at the “Identity status” column. The status should change from “Verification pending” to “Verified” once the DNS records have been propagated.
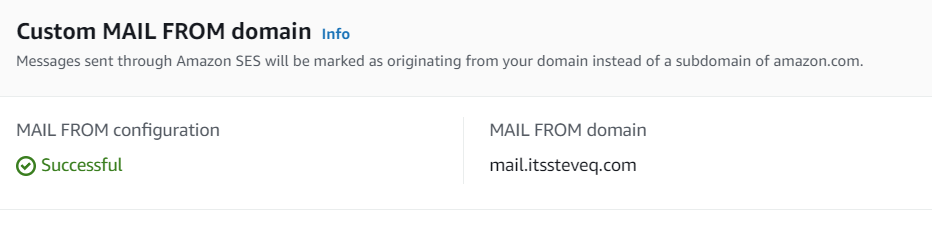
Setup Custom MAIL FROM domain
One of the ways to improve email deliverability and build trust with your recipients is by using a “Custom MAIL FROM domain” in AWS SES. With this feature, the messages that are sent through Amazon SES will appear to be coming from your own domain instead of a subdomain of Amazon.com.
Setting up a Custom MAIL FROM domain involves adding DNS records to your site’s DNS settings. The first step is to create a new TXT record in your domain’s DNS settings. This TXT record contains information that AWS SES uses to verify that you own the domain. Once the TXT record is created, you can then configure the Custom MAIL FROM domain in the AWS SES console.